Israel Sumner Saxe, my grandfather, passed away that cold, snowy morning in Boston, 12 days shy of his 91st birthday. He is survived by his wife of 68 years, Ethel, three children, five grandchildren and four great-grandchildren.
I last saw Grandpa over the summer, when Maya and I went to Massachusetts for a visit with my grandparents. At the time he was slowing down and in pain, but doing his best to enjoy life. That’s not how I choose to remember Grandpa. I remember him as a big, strong man who didn’t take shit from anyone and always told it like he saw it. A man who was loved by everyone who knew him.
My earliest memories of Grandpa are in Grandma and Grandpa’s house on Margaret Lane, playing with my brother and cousins in and around the pool. Fishing on Lake Massapoag in Sharon, MA and in the pond at Grandma & Grandpa’s condo on Cape Cod. Learning to shoot a pistol. Watching Grandpa cook breakfast for everyone at the Massapoag Sportsmen’s Club, which he founded in the 1950’s after being denied membership to another club because he was a Jew. Taking the ferry to Martha’s Vineyard. My favorite, and strongest memory, is watching Grandpa smoke his pipe, burning a sweet-smelling tobacco. The smell of his tobacco is indelibly imprinted in my head. To this day I think of him every time I see someone with a pipe or I smell pipe tobacco.
I spent the past few days with my extended family sharing stories about Grandpa and his life. Yesterday he was laid to rest at Sharon Memorial Park in Sharon, MA. Rabbi Jonathan Hausman presided over a moving service. As the pallbearers wheeled his casket to the hearse, I noticed that the funeral home was standing room only. Grandpa always said nobody would show up at his funeral, he had “outlived all of his friends,” in his words. By my estimate over 100 people attended on a cold Christmas Eve to say their final goodbye to a great man who touch the lives of so many people.
Standing at the gravesite in 37 degree Fahrenheit temperatures, surrounded by snow and ice, the Mourner’s Kadish was read. Before completing the final mitzvah (good deed) of burying his casket, his grandchildren, children and son-in-laws smoked Grandpa’s pipes filled with his favored vanilla flavored tobacco, filling the air with the sweet scent of pipe smoke in his honor. As we smoked, we performed the mitzvah, shoveling dirt upon his casket, filling his grave as we said goodbye. The first shovelful by each mourner is done upside-down, using the back of the shovel making it difficult to use, as a symbol of our reluctance to complete the task. Normally, the family and assembled mourners shovel a small amount of earth into the grave; the cemetery groundskeepers complete the remainder of the work. In an act of love, kindness and ultimate respect the gathered crowd remained under cold, overcast skies, family and friends each taking part in the mitzvah until his grave was completely filled.
This week has been one of the most difficult of my life. I am finding it hard to believe that I won’t speak with him again; I won’t Skype with him again to show him how Maya is growing up. He is gone, but he is not forgotten. At the funeral, I was handed a videotape of interviews conducted in 2004 with Grandpa to share stories of his life, particularly focused on his family’s emigration from Poland in 1924. (Ukraine? The fluid borders in that area in the 1920’s make it difficult to determine without more research.) My aunt found an audiotape of interviews starting in 2004 where Grandma and Grandpa attempted to verbally document their lives. In the next few weeks I hope to have digital replicas of these to distribute to our family. I have resurrected my work on my family tree, a project I began when Maya was born. Grandma was instrumental today in providing information about his relatives and hers. My grief will be turned into work to preserve our family history for those who remember my Grandpa and those who never had the pleasure of meeting him.
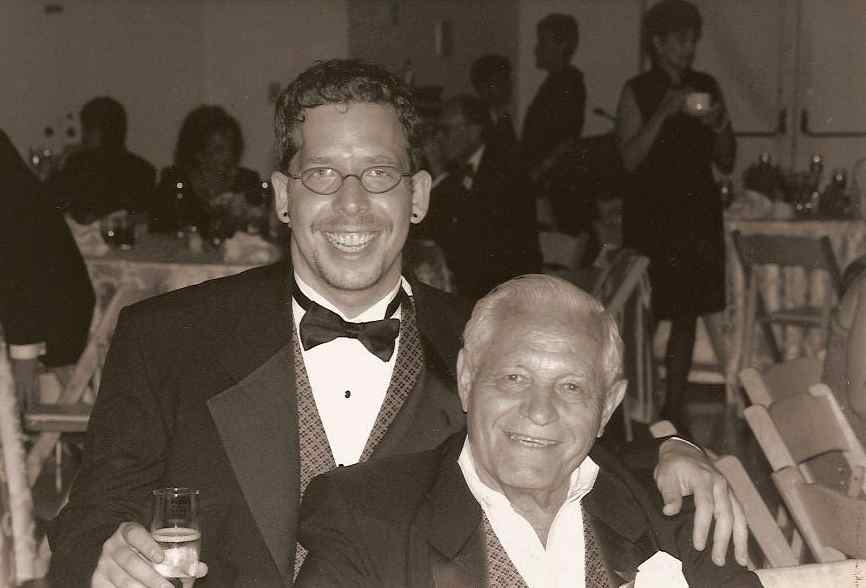
Israel “Sumner” Saxe
January 1, 1919 – December 20, 2009
עליו השלום (alav ha-shalom)
Peace be upon him